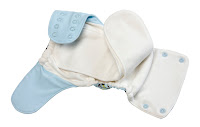
Diaper liners can serve a couple of different purposes, and can be made from many different fabrics.
Three Purposes of Diaper Liners
As you know, most diaper creams (over-the-counter and prescription) are not safe for cloth diapers, as they can permanently adhere to the diaper fabric and cause wetness to repel from the diaper. These creams do not wash out of the diapers. Unless you use coconut oil or cloth-diaper-safe-creams, you will need to use a liner in your cloth diaper every time you put cream on your baby's bum.
Secondly, a diaper liner can be used as a stay-dry layer between baby's bum and an absorbent fabric that may be harmful or too wet on baby's bum. For example, some natural fibers can irritate the skin and cause a rash. Also, while microfiber is a great, quick absorber, microfiber should never be place directly against baby's bum, as it will draw out moisture from the skin. If using the liner for to protect the skin, be sure the liner fully covers the irritating fabric.
Some moms chose to use liners with every diaper change as a way of limiting the amount of contact sticky poo has with the diaper. If using liners in order to cut down on clean-up, it makes sense to use a flushable liner (vs. reusable liner). Let's discuss the pros and cons of each type.
Flushable vs. Reusable Diaper Liners
Flushable liners are nice for convenience sake, but they aren't perfect. Many moms find they are too thin and move around in the diaper too much to be effective or comfortable for baby. Some complain the wipes are scented and, therefore, contain unnecessary chemicals.
Reusable liners do take a little more effort. I find the biggest inconvenience to be the requirement that I wash the liners separately from my diapers when using cream or Vaseline. That being said, reusable liners are inexpensive to buy or make yourself. I have multiplied my supply, so I can have enough liners to last me through a week of use. Then, I just throw the liners in with baby's regular laundry (after a quick pre-rinse following each diaper change).
Buying vs. Making Reusable Liners
A few reusable diaper liners are commercially marketed these days: Bummis (pictured above) and Kanga Care are the biggest sellers, and go for around a dollar each. Many sellers on Etsy.com market liners made of fleece, microfleece, cotton velour, suedecloth. These same fabrics are carried at most local and chain fabric stores, and are very affordable; for this reason, I opted to make my own. I believe I spent around five bucks at Hancock Fabrics for some super-soft buttersuede (their version of suedecloth), and I have made at least 15 liners, with plenty of fabric left-over. If you can't find the fabric you want in your area, you can buy several appropriate fabrics on Amazon. The great thing about "making" liners from suedecloth, and some fleece fabrics...all you have to do is measure and cut the fabric. These materials do not fray with use. Super easy! I have used both fleece and microsuede liners.
In terms of deciding which fabric to use, I have found that poo slides off of suedecloth much easier than off of fleece. The suedecloth also dries much quicker than fleece. I did find that the fleece seemed to stay in place better than suedecloth, because the suedecloth I used has a somewhat slippery backside. All in all, I continue to like the suedecloth liners I made the best, and I continue to use them when needed.
What type of liners do you use?
Saturday, June 22, 2013
Diaper Liners
Labels:
Amazon,
cloth diapers,
coconut oil,
cream,
diaper cream,
diaper liners,
diaper rash,
Etsy,
fabric,
fleece,
flushable,
irritation,
liners,
microfleece,
poo,
reusable,
stay-dry,
suedecloth,
wash
Thursday, June 20, 2013
Coconut Oil
...straight to my baby's bum!
Let me briefly tell you my story. For 4 months we fought my son's never-ending yeast infection. We tried nystatin, clotrimazole - over-the-counter, and prescription strength. We even tried our pediatricians own made up concoction put together at the pharmacy specifically for us. For four months I continued to follow the doctor's orders of applying cream 3-4 times per day (and messing with diaper liners to protect my cloth diapers), but the yeast infection persisted. Giving up on western medicine, I began doing my own research when I came across the healing properties of coconut oil. I had some around for my own use while breast feeding and tried it immediately on my baby's raw bum. No joke - within three days, the yeast infection was gone! A-maz-ing! Fortunately, my baby hasn't developed other types of rashes, but I can imagine the coconut oil is worth trying on any type of skin irritation. I now use it twice a day to prevent any skin break-down. I also use GroVia's Magic Stick, which is a great product and really easy to use on-the-go.
Did I mention coconut oil is SAFE for cloth diapers? Yes, it is! Because it contains 100% natural ingredients, the oil will wash right out of the diapers without causing any build up problems. It's also inexpensive and can be found in most grocery stores these days. It's even pretty cheap on Amazon. Coconut oil is my new best friend, and it will be yours as soon as you try it!
What have been your experiences with coconut oil?
Wednesday, June 19, 2013
GroVia's Magic Stick
If you haven't already heard, it's important to know that the majority of diaper creams are NOT safe to use on baby's bum when you are using cloth diapers. The creams can build up in the diaper and destroy the fabric. Your two options are to use diaper liners or to use ointments safe for cloth diapers. If you decide to use liners, read my post about making your own reusable liners or you can buy the Bummis ones. Of course, you can also go with a flushable type. If you don't want to mess with liners on a regular basis, a must purchase is GroVia's Magic Stick. This product is amazing for several reasons. It is effective, and beat all minor irritations and rashes I have encountered. Plus, it is hands-free, so your fingers don't get all messy mid-diaper change. It's not going to melt in your diaper bag during summer months or make a mess if the top accidentally pops open. An added bonus is that it smells nice. Also, consider using coconut oil in addition or instead of the Magic Stick.
Have you tried the Magic Stick? What other cloth diaper safe ointments have you used?
Laundry
Oh, laundry...the part of cloth diapering that many people say keeps them from even attempting cloth diapers. The truth is, once you get a routine down, washing your cloth diapers becomes about the same effort as taking bags of stinky disposable diapers out to the garbage at least daily. It is true that you have to launder your diapers correctly, or else you will end up with detergent build-up, ammonia, stains, or other nasty problems. It's also important to strip your diapers every six months, or more often if needed. Let's talk about pre-wash/pre-rinse, storage of dirty diapers, frequency of washing, cycles, detergent, and drying.
Pre-Wash/Pre-Rinse
Rule number one: poo must go down the toilet! Never leave it on your diaper expecting it to come out in the wash. Your diapers will likely not come out clean and will probably be stained. If you like, you can purchase a bumGenius Diaper Sprayer that attaches to your toilet for the purpose of spraying poopy diapers. I am blessed to have a child with rather firm poo, so his normally rolls right off. I then use an old toothbrush to immediately scrub out any marks left on the diaper. If you don't care about stains, this would not be necessary.
You'll find many methods out there for urine-only diapers. Some moms choose to place the urine-soaked diaper immediately in a pail and leave it there until wash time. That was my initial method; however, I began having problems with ammonia and decided to begin rinsing them immediately after a diaper change. It's not a long process, just 30 seconds or so - long enough until the diaper no longer smells of urine. This pre-rising (combined with my storage technique described below) have keep away all the stink!
Storage of Dirty Diapers
After reading a lot of reviews, I initially used a large Planet Wise Diaper Pail Liner inside a garbage can. This combination worked perfectly at containing the stink to the diaper pail and could hold even more diapers than I owned. Even after a super wash on all my diapers, my ammonia problem persisted, so I switched to storing the dirty diapers in an open laundry basket similar to this one. I had read that storing them in an open container actually decreases the odor, because the bacteria-causing-odor does not like oxygen. A wet, closed-up diaper pail is breeding grounds for the bacteria. To further prevent bacteria/ammonia build-up, I allow the wet diaper to dry until damp on the rim of the laundry basket before tossing it in with the other dirty diapers. This method is working great for me. Although there is a minor stench wafting from the baby's bathroom on the day before washing, his diapers no longer smell like ammonia while he is wearing them!
Frequency of Washing
Every other day. Period. Leave the urine in the diapers much longer than that and the urea in the urine can turn to ammonia, which takes a bit of work to get out of your diapers. For a great article on understanding ammonia, see this article by Rock In Green detergent.
Cycles
Initially, I did only one cycle when washing diapers. This was a big mistake, as they were not getting clean. The method that works great for me is: pre-rinse (cold), wash (hot) with detergent, and an extra rinse (cold). Even if you only have a few diapers, it is important to set the fill line to medium or high for all cycles in order to maximize the cleanse. If you do not pre-rinse your diapers after each diaper change, you may need to do more than one pre-rinse to break up the crystallized urea in the diapers.
Detergent
I tried using an all-natural detergent (Nellie's) recommended to me, but found this was useless in cleaning diapers. In fact, it doesn't even clean our regular laundry. All Free & Clear has worked perfectly. Here is a great web-site for figuring out if the detergent you are using is safe for your diapers.
The key with the detergent is to not use too much. It is better to err on the side of using too little than using too much. You should only use about 1/3-1/2 the amount of detergent recommended on the bottle. Use more than that, and your diapers will get detergent build-up and hold stink.
Drying
Yes, most diaper inserts can be dried with heat in your dryer. Do I put my diapers in the dryer? No. The reason I am using cloth diapers is to keep some money in my pocket and to be kind to the environment. Running my dryer isn't exactly in line with those objectives. If you are going to put your diapers in the dryer, be warned that repeatedly using heat on your covers made of PUL can destroy their ability to hold wetness.
Depending on the humidity in the air, my hang dried diapers are normally fully dried 16-24 hours later. Inserts made with more layers or with natural fibers take longer to dry than the others. Some of the natural fabrics are more stiff when air dried, but this isn't a problem as long as they aren't touching your babies bum. Hopefully you have already heard that sun drying your diapers makes breastfed baby poo disappear like magic!
What is your process for washing your diapers? With which detergents have you had the best luck?
Tuesday, June 18, 2013
Cloth Diaper Types
The best place to start is knowing which types of cloth diapers are out there. With the exception of all-in-one's (AIO's), all cloth diapers are made up of two equally essential parts: (1) the waterproof diaper cover and (2) an absorbent, multi-layer diaper/insert. The most popular types are: prefolds, fitted, all-in-two (AI2), pocket, and all-in-one (AIO).
The Diaper Cover
There are a wide-range of diaper covers, and this is where you get to have some fun and pick cute patterns. The key element all diaper covers have in common is that they are water proof (using a fabric called PUL) on their outer-most layer. Many covers consist of only one layer of PUL, and these are intended to be used with an AI2 system, prefolds, or fitted diapers. Because a child's urine would rather cling to the ultra-absorbent fabric inside the cover rather than the water-repellent PUL, these covers can be reused multiple times without holding wetness or a smell. Other diaper covers (such as covers used in the popular pocket diapers) have a layer of suede cloth inside, which means they must be washed after each use. Most brands carry their diapers with either snaps or hook and loop (Velcro). Most have single leg gussets, but some brands (such as Best Bottom, Blueberry, Thirsties) have double leg gussets to further protect against leaks. You can see the double leg gussets in the Thirsties cover pictured above.
Other popular brands include: Bumkins, Bummis, Flip, and Kushies.
Prefolds
The prefold system of diapering most closely resembles the cloth diapers we wore as babies. Going this route is one of the cheapest options, especially because you can theoretically use all the same materials birth through potty training. I no longer use prefolds regularly, as I find my son began to wet through them too quickly around 6 months. Other fabrics (such as organic hemp/cotton, microfiber, and Zorb) absorb larger quantities of wetness without adding as much bulk as the cotton prefolds.
The prefold can be tri-folded to resemble an insert, or it can be folded as our mother's did. Trifolding is the quicker option; however, some find there to be less leaking (of both urine and breastfed baby poo) when using the traditional fold. If you are going to use prefold for trifolding, the OsoCozy Better Fit (pictured to the right, on top) are the best; they are shorter and fit better in the diaper than any other prefold (as demonstrated above). For traditional folding, I was happy with my experience using OsoCozy Unbleached Prefolds and Snappis. Confused as to how to do the traditional fold? Check out this video on Youtube for a quick demo.
Fitted
A great, leak-free, blow-out free system...if you don't mind putting two diapers on your baby at every diaper change. Fitted diapers are essentially a plush, super-soft, fleece diaper contained within a diaper cover. A major down-side is that most brands have a size 1 and a size 2, requiring you to buy double the products to get you through to potty training. I myself have not used fitted diapers, as the initial investment has scared me away. However, I have friends that love them, and their favorite brand is Kissaluvs. Other popular fitted brands include: BabyKicks, Bumkins (pictured above), Thirsties, and Mother-Ease.
AI2
This is my favorite system. It is the most economical, creates the least amount of laundry, fits the trimest-looking, and uses the least amount of storage room. This system uses a diaper cover (the same 1-2 covers can be used all day) and inserts (brand name, home-made, really any fabric you want!). When it is time for a diaper change, simply slide out the wet insert and replace with a dry insert. The whole process is quicker than changing a disposable diaper. You change the diaper cover if it becomes wet or soiled. I often go an entire day using the same cover if it has not gotten wet. If it does become wet, I simply wipe it out, and let it air dry until the next diaper change.
Some brands (such as Best Bottom - see demo on right) make their inserts to snap into their covers. Other brands (such as Flip, pictured above) have flaps in front and in back of the diaper cover to keep the insert from moving around. My super-active 14 month-old has never had a problem with his inserts moving out of place in either style.
You can also make the AI2 into a hybrid system by using the same diaper covers with disposable inserts. gDiapers, Bumkins, GroVia, and Flip make their own disposable inserts.
Pocket
Pocket diapers consist of a pocket diaper cover with your choice of insert(s) inside the pocket. The diaper cover is normally one layer of PUL with one layer of suede cloth or fleece on the inside. The pocket lies between these two layers and opens to the rear, as pictured in the Blueberry Deluxe to the right. Depending on the absorbency desired, you can choose how many and what type of inserts to use. I consider it to be essential to have at least a few pocket diapers in your stash. I use the bumGenius 4.0 as my overnight diaper and going-out-for-errands diaper, and I love it! I fill it with a microfiber insert + the Best Bottom Organic Cotton/Hemp. This combination has the perfect absorbency for my heavy wetter! Other popular brands include: Fuzzibunz, Rumparooz, and Thirsties Duos (beware, as Thirsties is not a one-size diaper).
AIO's
The all-in-one system is the Cadilac of cloth diapering. They are the most expensive and require the least amount of effort. Essentially, they look like and have the ease of disposable diapers. No inserts, no folding, no hassle. The multiple layers of absorbant fabric are sewed to the diaper only on one side, so each is thoroughly cleaned when you through them in the wash. The most popular AIO diapers include the bumGenius Freetime, Swaddlebees Simplex, Bumkins AIO, and GroVia AIO (pictured to the left).
I have listed above the most popular diaper brands. However, there are hundreds - maybe thousands - of diapers being made by SAHM's (Stay at Home Moms). Etsy.com is a great place to find homemade products.
What is your favorite type of diaper? Where do you buy your diapers?
The Diaper Cover
There are a wide-range of diaper covers, and this is where you get to have some fun and pick cute patterns. The key element all diaper covers have in common is that they are water proof (using a fabric called PUL) on their outer-most layer. Many covers consist of only one layer of PUL, and these are intended to be used with an AI2 system, prefolds, or fitted diapers. Because a child's urine would rather cling to the ultra-absorbent fabric inside the cover rather than the water-repellent PUL, these covers can be reused multiple times without holding wetness or a smell. Other diaper covers (such as covers used in the popular pocket diapers) have a layer of suede cloth inside, which means they must be washed after each use. Most brands carry their diapers with either snaps or hook and loop (Velcro). Most have single leg gussets, but some brands (such as Best Bottom, Blueberry, Thirsties) have double leg gussets to further protect against leaks. You can see the double leg gussets in the Thirsties cover pictured above.
Other popular brands include: Bumkins, Bummis, Flip, and Kushies.
Prefolds
The prefold system of diapering most closely resembles the cloth diapers we wore as babies. Going this route is one of the cheapest options, especially because you can theoretically use all the same materials birth through potty training. I no longer use prefolds regularly, as I find my son began to wet through them too quickly around 6 months. Other fabrics (such as organic hemp/cotton, microfiber, and Zorb) absorb larger quantities of wetness without adding as much bulk as the cotton prefolds.
The prefold can be tri-folded to resemble an insert, or it can be folded as our mother's did. Trifolding is the quicker option; however, some find there to be less leaking (of both urine and breastfed baby poo) when using the traditional fold. If you are going to use prefold for trifolding, the OsoCozy Better Fit (pictured to the right, on top) are the best; they are shorter and fit better in the diaper than any other prefold (as demonstrated above). For traditional folding, I was happy with my experience using OsoCozy Unbleached Prefolds and Snappis. Confused as to how to do the traditional fold? Check out this video on Youtube for a quick demo.
Fitted
A great, leak-free, blow-out free system...if you don't mind putting two diapers on your baby at every diaper change. Fitted diapers are essentially a plush, super-soft, fleece diaper contained within a diaper cover. A major down-side is that most brands have a size 1 and a size 2, requiring you to buy double the products to get you through to potty training. I myself have not used fitted diapers, as the initial investment has scared me away. However, I have friends that love them, and their favorite brand is Kissaluvs. Other popular fitted brands include: BabyKicks, Bumkins (pictured above), Thirsties, and Mother-Ease.
AI2
This is my favorite system. It is the most economical, creates the least amount of laundry, fits the trimest-looking, and uses the least amount of storage room. This system uses a diaper cover (the same 1-2 covers can be used all day) and inserts (brand name, home-made, really any fabric you want!). When it is time for a diaper change, simply slide out the wet insert and replace with a dry insert. The whole process is quicker than changing a disposable diaper. You change the diaper cover if it becomes wet or soiled. I often go an entire day using the same cover if it has not gotten wet. If it does become wet, I simply wipe it out, and let it air dry until the next diaper change.
Some brands (such as Best Bottom - see demo on right) make their inserts to snap into their covers. Other brands (such as Flip, pictured above) have flaps in front and in back of the diaper cover to keep the insert from moving around. My super-active 14 month-old has never had a problem with his inserts moving out of place in either style.
You can also make the AI2 into a hybrid system by using the same diaper covers with disposable inserts. gDiapers, Bumkins, GroVia, and Flip make their own disposable inserts.
Pocket diapers consist of a pocket diaper cover with your choice of insert(s) inside the pocket. The diaper cover is normally one layer of PUL with one layer of suede cloth or fleece on the inside. The pocket lies between these two layers and opens to the rear, as pictured in the Blueberry Deluxe to the right. Depending on the absorbency desired, you can choose how many and what type of inserts to use. I consider it to be essential to have at least a few pocket diapers in your stash. I use the bumGenius 4.0 as my overnight diaper and going-out-for-errands diaper, and I love it! I fill it with a microfiber insert + the Best Bottom Organic Cotton/Hemp. This combination has the perfect absorbency for my heavy wetter! Other popular brands include: Fuzzibunz, Rumparooz, and Thirsties Duos (beware, as Thirsties is not a one-size diaper).
AIO's
The all-in-one system is the Cadilac of cloth diapering. They are the most expensive and require the least amount of effort. Essentially, they look like and have the ease of disposable diapers. No inserts, no folding, no hassle. The multiple layers of absorbant fabric are sewed to the diaper only on one side, so each is thoroughly cleaned when you through them in the wash. The most popular AIO diapers include the bumGenius Freetime, Swaddlebees Simplex, Bumkins AIO, and GroVia AIO (pictured to the left).
I have listed above the most popular diaper brands. However, there are hundreds - maybe thousands - of diapers being made by SAHM's (Stay at Home Moms). Etsy.com is a great place to find homemade products.
What is your favorite type of diaper? Where do you buy your diapers?
Labels:
AI2,
AIO,
Best Bottom,
Blueberry,
bumGenius 4.0,
Bummis,
cloth diapers,
diaper cover,
Etsy,
fitted,
Flip,
Fuzzibunz,
GroVia,
Kissaluvs,
OsoCozy,
pocket,
prefolds,
SAHM,
Snappis,
Thirsties
Amazon
Doing the Research
Cloth diapering has become more trendy in recent years, and as a result, there are almost too many options to choose. I know I felt overwhelmed when I began researching. I found not only multiple types and brands, but also most moms claiming that their method is the best way to cloth diaper. I have since realized that everyone has a system that works best for their family. Additionally, a system that works well for a child may not properly fit as the child grows older or for another child. Therefore, it's so important to keep an open mind and be bold enough to try out different methods as you go along.
I did my research from a variety of places, including on-line blogs, brick and mortar stores (you can find cloth diaper stores in most large cities), Amazon reviews, and YouTube. Of course, talking to other moms to hear their experience is great, too. Once I had an idea of the basic types of diapers, I found YouTube videos to be the most useful in helping me to narrow down my options. Hundreds of videos have been made by stay-at-home moms comparing various diapers to one another. You can basically type in to the search field which diapers you are considering and can see an interactive video weighing the pros and cons of each. It's nice to see them in action on the videos.
You should come out of the research stage knowing the different types of diapers and which brands you prefer. These topics are so large they have their own posts.
How much research did you do before buying your diapers? Where did you find the to be the best sources of information?
What's with the name?
One of the first questions you probably had when visiting the Diaper Rumble blog was "What's with the name?"
Well, diaper (pronounced: dī(ə)pər) is an absorbent material placed around a baby's bottom to catch the baby's urine and poo in order to prevent the clothes, crib, carseat, carpet, and Mom and Dad from getting soiled. You probably already knew that. Since the blog is primarily about diapering, it is important this word is a part of the name.
Rumble (pronounced: rəmbəl) is a deep, resonant sound. You probably already knew that, too. When our child was a few days old, he had quite a bit of gas, as most babies do. Every time he passed gas, his diaper would make a rumbling noise. We thought it was the funniest and cutest thing we had ever heard. In fact, we joked about the diaper rumbling so much that my husband quickly coined the term "diaper rumble," and it stuck as our pet phrase to indicate our little guy was passing gas. Well, rumbling is also used to refer to a large crowd talking and chattering about. Since the aim of this blog is to discuss cloth diapering with (hopefully) a large crowd of interested parents and parents-to-be, we knew Diaper Rumble was an excellent name for the blog.
We hope you appreciate the blog (and the affectionate term after which it was named) as much as we do!
Labels:
blog,
cloth diaper,
cloth diapering,
diaper,
name,
rumble,
rumbling
Monday, June 17, 2013
Let the Rumble Begin!
Today marks the launch of Diaper Rumble. This is a blog about my experience cloth diapering: what I have learned, what I have bought, the routine I have developed, and a few of the minor catastrophes I have experienced along the way. I'm not going to spend a lot of time telling you all the reasons you should cloth diaper, because you already know cloth diapering can keep thousands of dollars in your pocket and hundreds of pounds out of landfills. If you are like me, you may have spent countless hours researching, purchasing, and making cloth diapers to build a stash that perfectly fits your needs - or maybe you are just at the beginning of this process. My goal is to impart some of my new-found knowledge and love for cloth diapers to all those ladies (and men) out there interested in cloth diapering. Let the rumbling begin!
Subscribe to:
Posts (Atom)